Nobody logs into a Season 22 server to see Kanturu, yet almost everyone on one is using Season 2, because the moment you drop a Jewel of Harmony onto a weapon you are running a system this patch invented. So this is not a 2006 changelog. It sorts Season 2 into what you still touch weekly, what later seasons took over, and what is now a sightseeing trip you can postpone.
Season 2 in sixty seconds
Season 2 rolled out across 2006 and 2007. It added one region in two halves, a four-stage boss raid, one gem, three item systems stacked on that gem, five weapons, five armour sets, a Dark Lord skill and a rewrite of who may walk where. The headline and the footnote have since swapped places: the raid was the marketing and is now a curiosity, while the gem was one line in the patch note and became the backbone of every gear decision from the mid game on. So this guide starts with the gem; the Season 1 guide covers the ground it was built on.
Harmony: the one Season 2 system you cannot skip
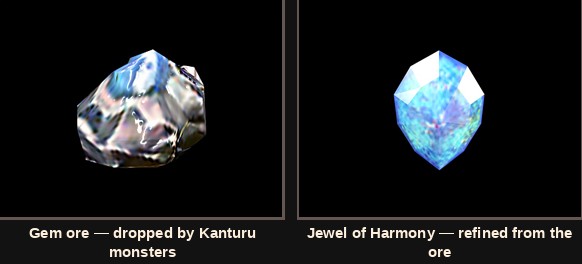
Harmony is the only gem you cannot simply farm. Monsters drop gem ore, and the ore has to survive a refine before it is worth anything. That second step is why the jewel has held its value through every economy rebalance since.
| Question | Answer |
|---|---|
| What actually drops | Gem ore, from Kanturu monsters |
| Who converts it | Elpis (77, 177), Tower of Refinement, Kanturu Ruins |
| Odds | Chance based, never guaranteed |
| A good result | One Jewel of Harmony for one ore |
| A bad result | The ore is destroyed |
One caution for our own players: we run a custom jewel system, so check in game how Harmony reaches your inventory here before planning a night around Elpis.
Enhancement: read this table before you spend a jewel
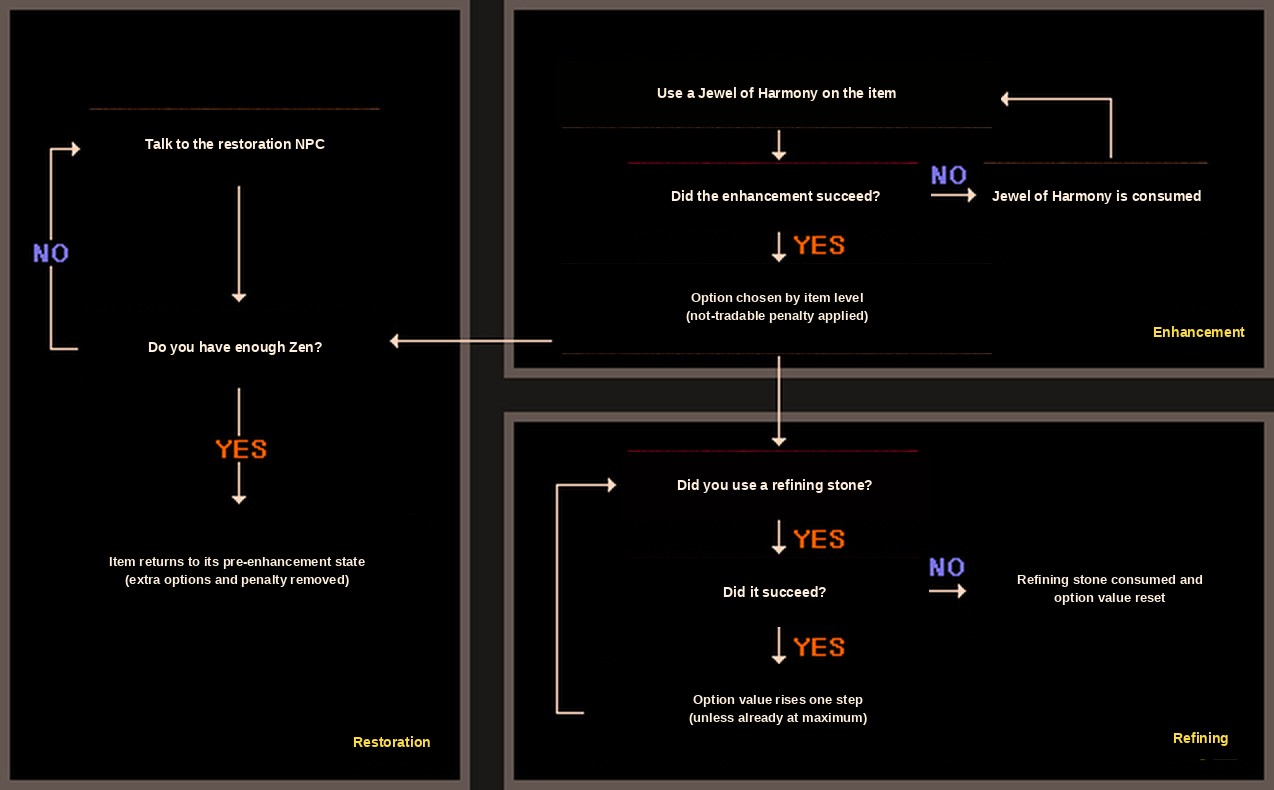
Enhancement hands a weapon or an armour piece one extra option, separate from its Excellent and additional options. Pick up the jewel, drop it on the item, and the game rolls. Jewels get wasted by not reading the eligibility rules first.
| Rule | What it means in practice |
|---|---|
| Eligible gear | Normal and Excellent items. Set items are locked out |
| How many rolls | One per item, so the roll you get is the roll you live with |
| What steers the roll | The item's slot and level; higher level, better odds of a top tier option |
| The hidden cost | An enhanced item cannot be sold to an NPC shop or listed in a personal shop |
That last row is the trap: enhance a piece you meant to sell on and you have removed your own exit, so enhance late, on gear you intend to keep. The pool widens with item level, and the three gear types draw from different pools. The patch note published three separate lists; side by side, each row shows only what that tier adds.
| Item level | On a weapon or bow | On a staff | On armour parts |
|---|---|---|---|
| +0 ~ +5 | Lower Strength and Agility requirements, minimum attack power, maximum attack power | Lower Strength and Agility requirements, magic power | Defence alone at +0; max AG and max HP join from +3 |
| +6 ~ +8 | Adds critical damage and attack power as a min-and-max pair | Adds critical damage and skill attack power | Adds automatic HP recovery |
| +9 ~ +12 | Adds skill attack power, SD reduction rate, PvP attack success rate | Adds SD reduction rate and PvP attack success rate | Adds automatic mana recovery, damage reduction, PvP defence success rate |
| +13 | Adds a chance to ignore SD on attack | Adds a chance to ignore SD on attack | Adds SD ratio |
Two of those options outweigh the rest, and both concern shields. SD reduction rate turns part of what your target's shield would soak into damage on their HP: at +5% their absorption falls from 90% to 85% and the share landing on HP rises from 10% to 15%. Ignore SD on attack skips the shield outright by chance. Those two decide duels and sieges. Two others have aged badly: the Strength and Agility requirement reductions existed when stat points were scarce, and with max stats of 32,700 on our server they buy nothing.
Refining and restoration: the undo button nobody presses
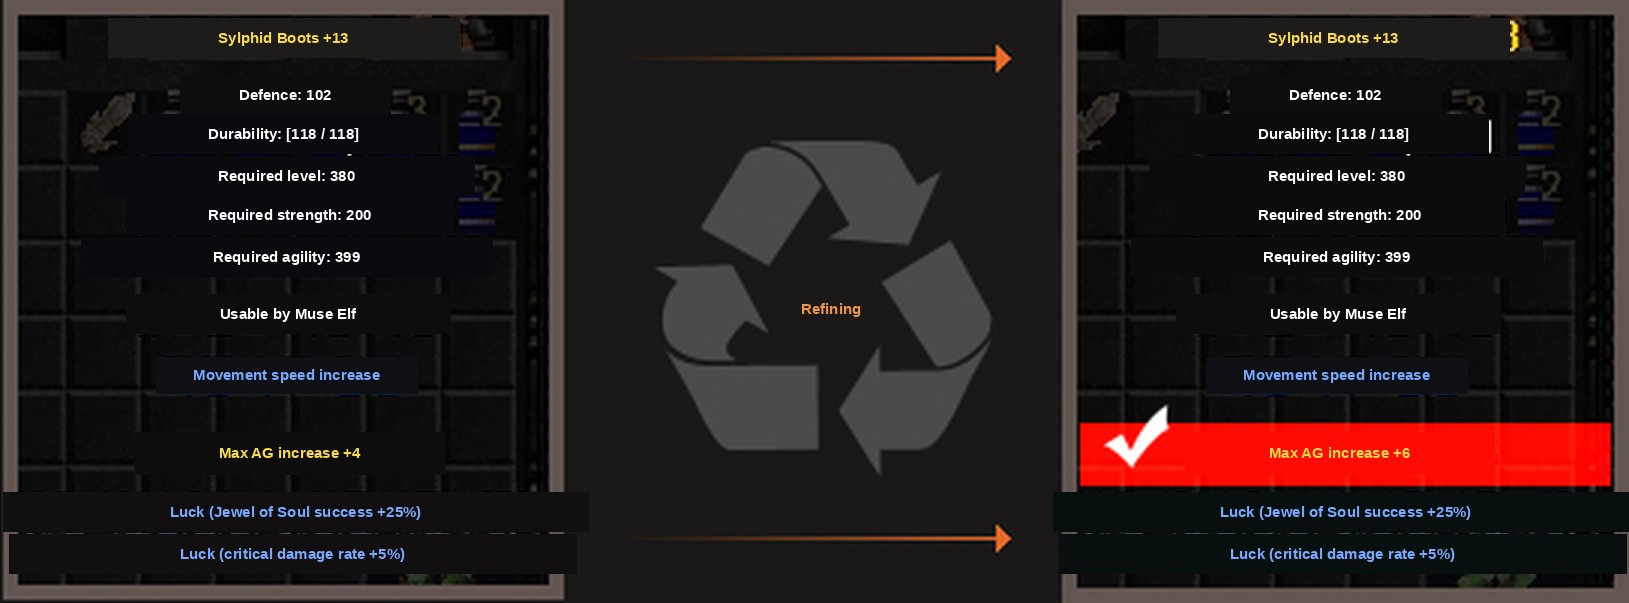
A fresh enhancement option arrives at its default value. Refining pushes that number up a step at a time, and it is the half of the loop most players never learn.
| Step | Detail |
|---|---|
| Who does it | Osborne (86, 13) in Aida |
| Stone from an Excellent item | An Advanced Refining Stone, the better odds |
| Stone from a Normal item | An Inferior Refining Stone |
| If the craft fails | The item you fed in is lost |
| If the refine lands | The option's value climbs one step |
| If the refine fails | The option drops to its default value |
Any normal or Excellent item can become a stone, but the cheap tiers carry a condition: everything below must be at +4 or higher before the NPC takes it. Gear above these tiers is accepted at +0.
| Type | Accepted only at +4 or higher |
|---|---|
| Swords | Assassin's Sword, Kris, Rapier, Short Sword |
| Axes | Double Axe, Hand Axe, Small Axe |
| Blunt weapons | Flail, Mace, Morning Star |
| Spears | Double Halberd, Dragon Lance, Great Trident, Halberd, Spear |
| Bows and crossbows | Arquebus, Battle Bow, Bow, Crossbow, Elven Bow, Golden Crossbow, Light Crossbow, Short Bow |
| Staffs | Angelic Staff, Serpent Staff, Skull Staff |
| Shields | Buckler, Elven Shield, Horn Shield, Kite Shield, Large Round Shield, Plate Shield, Skull Shield, Small Shield, Spiked Shield |
| Armour sets | Bone, Brass, Bronze, Leather, Pad, Scale, Silk, Sphinx, Vine and Wind sets |
Restoration is the other NPC on the same square, Jerryden (86, 13) in the Aida safe zone, and the most under-used service in the game. It clears the option values and lifts the no-shop, no-trade penalty, never fails, and costs only Zen, scaled to the item's level and the options on it.
Kanturu on a high-exp server: a stop, not a home
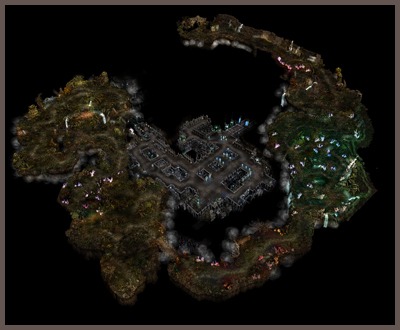
You walk in from Tarkan (199, 6), or use the move window on M once your level clears the bar. Either half costs 12,000 Zen to warp to.
| Map | Level to walk in | Level the move window needs |
|---|---|---|
| Kanturu Archaeological Site | 150 | 160 |
| Kanturu Ruins | 220 | 230 |
For a limited window after the update went live, both halves were open at level 10 and travel was free. The numbers above are the permanent setting the patch note gave.
Those thresholds are the whole story of how Kanturu fits a modern climb. On a high-exp server you pass 150 in your first evening and 220 soon after, so you arrive with your gear well behind the map, and you need neither half to level. Come for the ore, come back for the Tower of Refinement, and treat it as a supply run.
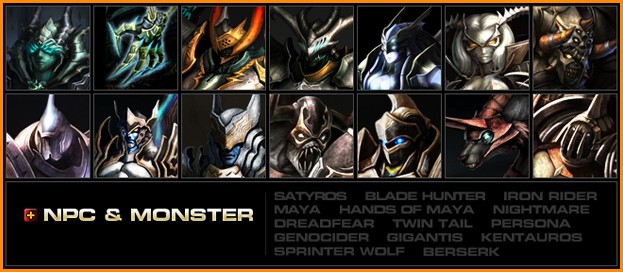
The region shipped with eleven ordinary monsters and two bosses: Satyros, Blade Hunter, Iron Rider, Dreadfear, Twin Tail, Persona, Genocider, Gigantis, Kentauros, Sprinter Wolf and Berserker, with Maya, her hands and the Nightmare on top. Learn two: whatever drops ore that day, and the Ruins spawns that drop the Moonstone Pendant.
Maya and the Nightmare: a raid later seasons made optional
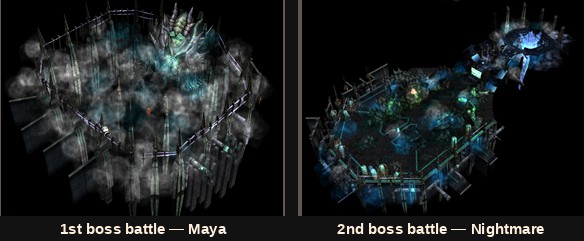
This was the hardest content in the game when it shipped, and it runs on a day-long clock that assumes a world boss is rare. With events and mini-bosses running all day on our Season 22 server, it competes with a schedule it was never designed for: still a good evening with a guild, no longer the only boss in town. The entry window is the fiddly part, tied to the tower's own cycle rather than a clock on the wall.
| Getting in | What happens |
|---|---|
| Your ticket | A Moonstone Pendant, hunted in the Kanturu Ruins |
| Head count | Fifteen characters, and no more |
| Hours 0 to 23 | The Tower of Refinement is open; at 23 hours the gate shuts |
| 23 hours 40 minutes | Anyone still inside is pushed to the Kanturu 2 safe zone |
| 23 hours 58 minutes | The boss map takes entries for two minutes, or until the fifteenth player |
Maya never fights you directly. She fights through her hands, in three escalating stages, each gated behind a wave of summons.
| Stage | What you have to clear | Clock |
|---|---|---|
| Left hand | Maya calls in monsters; the hand appears once they are dead | 15 minutes |
| Right hand | A second two-minute window, another group, then the hand | 15 minutes |
| Both hands at once | A third window, another group, then both hands at once | 20 minutes |
With both hands down her power breaks and your character drops to the floor. Count 30 seconds and the second phase walks in: the Nightmare, which brings its own summons and tops them up whenever their number falls below a threshold. You have 20 minutes. A stage is lost when the timer expires or every character dies; dying yourself only moves you to a safe zone inside the ruins, and a failure locks you out until a cooldown passes.
Add Option: still the last step on level 380 gear
Add Option came through from Season 2 untouched, and newer players confuse it with enhancement. It is a separate channel, run from the Add Option menu on the Chaos Goblin, and it hands over a fixed value rather than a rolled one. The game counts it as a different kind of option, so one item can carry both at once.
| Requirement | Detail |
|---|---|
| The item | A level 380 weapon or armour at +4 or higher, already carrying +4 or better additional options |
| The bill | A Jewel of Harmony, a Jewel of Guardian and 10,000,000 Zen |
| Success rate | Applies at item level |
|---|---|
| 50% | +4 ~ +6 |
| 60% | +7 ~ +9 |
| 70% | +10 ~ +13 |
Read those odds next to the requirement and the strategy writes itself: push the item's level first, then spend the jewels. Every slot also gets PvP defence success rate, which says plainly who the system was built for.
| Slot | Fixed options it can receive |
|---|---|
| Weapon | PvP attack power, PvP attack success rate |
| Helmet or mask | PvP defence success rate, SD recovery amount |
| Armour | PvP defence success rate, SD automatic recovery |
| Pants | PvP defence success rate, PvP defence |
| Gloves | PvP defence success rate, max HP |
| Boots | PvP defence success rate, max SD |
The gear and the skill: what later tiers replaced
The drops are the clearest case of Season 2 being superseded rather than removed: all of it still exists and still works, but none of it is a target, because twenty seasons of higher tiers sit above it. What made the five weapons notable was never their damage but that a weapon could grant a skill.
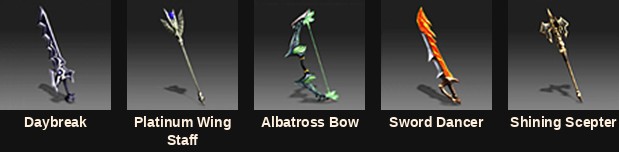
| Weapon | Drops from level | What it does | Str | Agi |
|---|---|---|---|---|
| Albatross Bow | 110 | 155 ~ 177 damage, 45 speed, 4 Multi-Shot | 218 | 894 |
| Daybreak | 115 | 182 ~ 218 damage, 40 speed, Spinning Strike | 682 | 132 |
| Platinum Wing Staff | 110 | One handed, mana +60, 30 speed | 185 | 72 |
| Shining Scepter | 110 | 99 ~ 111 damage, pet damage +30%, Force Wave | 376 | 92 |
| Sword Dancer | 115 | 109 ~ 136 damage, magic power +54, Power Slash | 489 | 216 |
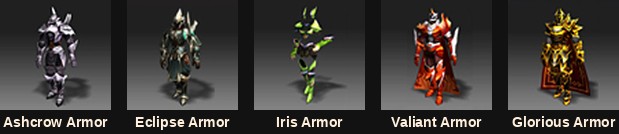
| Armour | Drops from level | Defence at +0 | Str | Agi |
|---|---|---|---|---|
| Ashcrow Armour | 75 | 42 | 380 | 132 |
| Eclipse Armour | 75 | 27 | 139 | 47 |
| Glorious Armour | 110 | 47 | 376 | 92 |
| Iris Armour | 75 | 36 | 132 | 177 |
| Valiant Armour | 115 | 52 | 489 | 216 |
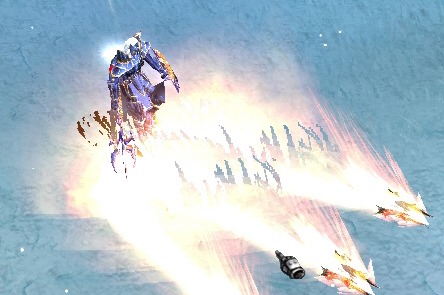
The skill, unlike the gear, is permanent. Fire Scream is Dark Lord only, one step above Fire Burst, learned from a Fire Scream Scroll off monsters of level 102 and above. On a Dark Lord, this is the Season 2 item to care about.
| Skill | Energy | Command | Mana | AG | Level requirement |
|---|---|---|---|---|---|
| Fire Scream | 150 | 70 | 45 | 10 | None |
The change you never notice, and why
Under the Kanturu headline, Season 2 rewrote travel level requirements across almost the whole world, loosening them nearly everywhere. It is the most thoroughly superseded part of the patch, since on high-exp files you pass these numbers faster than you can read them, but it is a good record of how tight early MU was.
| Map | Entry level from Season 2 | Move level from Season 2 | Entry level before | Move level before |
|---|---|---|---|---|
| Lorencia | 10 | 10 | 10 | 50 |
| Noria | 10 | 10 | 10 | 50 |
| Devias | 15 | 20 | 15 | 50 |
| Dungeon 1 | 20 | 30 | 20 | 50 |
| Dungeon 2 | 20 | 40 | 40 | 50 |
| Dungeon 3 | 20 | 50 | 50 | 60 |
| Lost Tower 1 | 40 | 50 | 80 | 90 |
| Lost Tower 2 | 40 | 50 | 80 | 90 |
| Lost Tower 3 | 40 | 50 | 80 | 100 |
| Lost Tower 4 | 50 | 60 | 80 | 100 |
| Lost Tower 5 | 50 | 60 | 80 | 110 |
| Lost Tower 6 | 50 | 70 | 80 | 110 |
| Lost Tower 7 | 50 | 70 | 80 | 120 |
| Atlans 1 | 60 | 70 | 60 | 70 |
| Atlans 2 | 60 | 80 | 60 | 70 |
| Atlans 3 | 60 | 90 | 60 | 70 |
| Tarkan 1 | 130 | 140 | 130 | 140 |
| Tarkan 2 | 130 | 140 | 130 | 140 |
| Icarus | 160 | 170 | 160 | 170 |
| Aida | 130 | 130 | 130 | 130 |
Three smaller items rounded out the patch, and two of them you now take for granted.
| Change | What it did |
|---|---|
| Windowed mode | The client stopped being fullscreen only |
| Skill tooltips | Descriptions written for siege and other situational skills |
| Minus Stat Fruit | Rewritten to strip 1, 3, 5, 7 or 9 points |
What to actually do about Season 2
Three mistakes come up again and again. Enhancing too early: one option per item, odds tied to item level, so a jewel spent on a +0 piece is how people end up with a defence roll on gear they replace within the hour. Forgetting Jerryden: the no-trade penalty feels permanent, it is not, and that changes which items you will experiment on. Treating Kanturu as a levelling map: it is a materials map and a crafting hub, so go in for ore and pendants, use the tower, and leave.
To see all of this on current files instead of reading about it: our server runs Season 22 on the latest server files with high exp, max stats of 32,700, events and mini-bosses all day and a custom jewel system, and it opens in 30 October 2026. Pick a class, create an account, and you can be at the Kanturu gate the same evening.
- Still core: the Jewel of Harmony and the enhance, refine and restore loop built on it.
- Still core: Add Option on the Chaos Goblin, the last step on level 380 gear.
- Still useful: Kanturu as an ore and Moonstone Pendant run, not as a grinding map.
- Superseded: the five weapons and five armour sets, long outclassed by later tiers.
- Superseded: the travel level rewrite, invisible once experience rates are high.
- Permanent: the Dark Lord's Fire Scream, learned from a scroll off level 102 monsters.