You will never play Season 5. You will play a Season 22 server and keep walking into Season 5 without being told. Three of its additions sit in your client on day one, four of its maps sit on your levelling route, one boss is still worth a trip, and twelve item sets are museum pieces whose rules outlived them. This guide sorts the 2009 – 2010 release into those four piles.
Why a 2009 patch still shows up in your client
Season 5 went after one problem: new players logged in, stood in Lorencia and had no idea what the game wanted. So the quest interface was rebuilt, the village guards were given something to say, and new characters got a walkthrough. The season later widened four maps, dropped a field boss into one, and filled out the early armour tiers. Plumbing is not torn out the way maps and events are, which is why so much of it is still load-bearing. Season 6 gave you places to go; Season 5 gave you the scaffolding.
The three pieces you use on day one
This is the part of Season 5 that is not history.
The quest window, bound to T
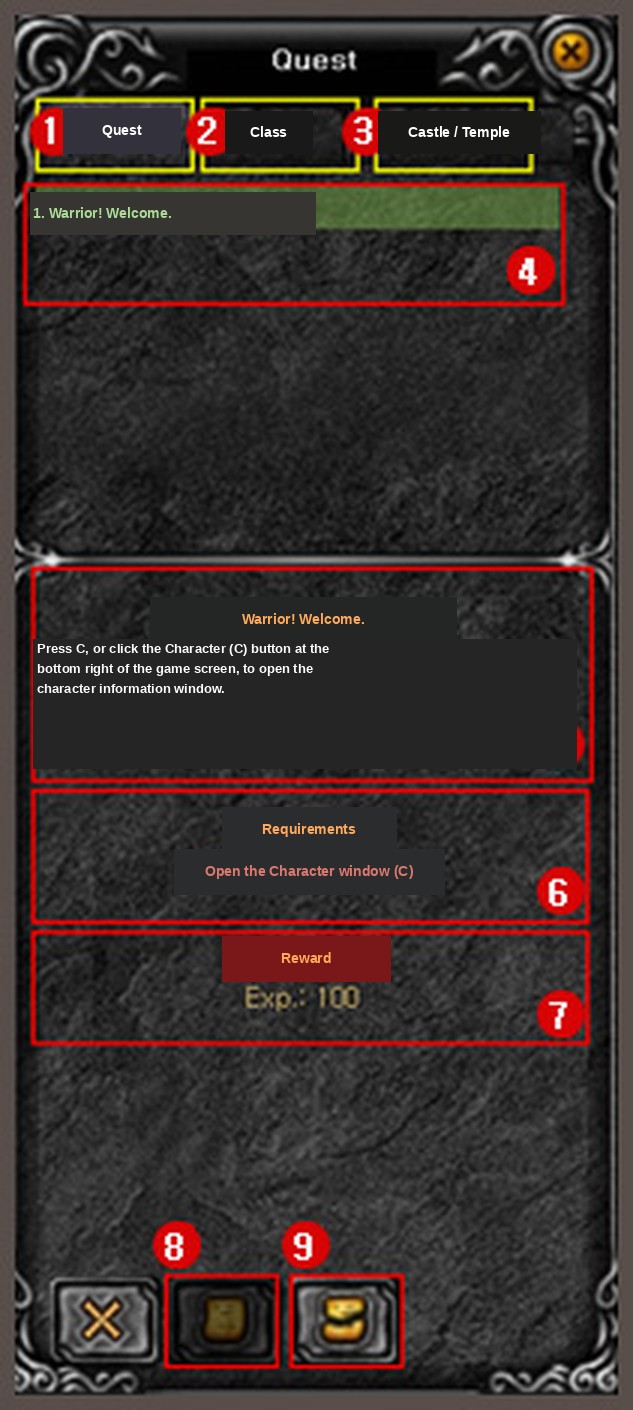
The old panel told you a quest existed and left the rest to you. Its replacement is the window you still open with T: three tabs, the quests you have running, and a full readout of whatever you highlight.
| Marker | What it shows |
|---|---|
| 1 | Tab 1 — general quest information |
| 2 | Tab 2 — class change quests |
| 3 | Tab 3 — Castle and Temple information |
| 4 | Every quest you currently have open |
| 5 | The text of whichever one you have highlighted |
| 6 | The conditions still standing between you and the finish |
| 7 | The payout waiting at the end of it |
| 8 | Open Quest, which advances lines that have no NPC attached to them |
| 9 | Abandon Quest |
Marker 8 is the one people miss. Some steps have nobody to hand in to, and new players sit on a finished objective waiting for a marker that never comes.
The Shadow Phantom Unit guards
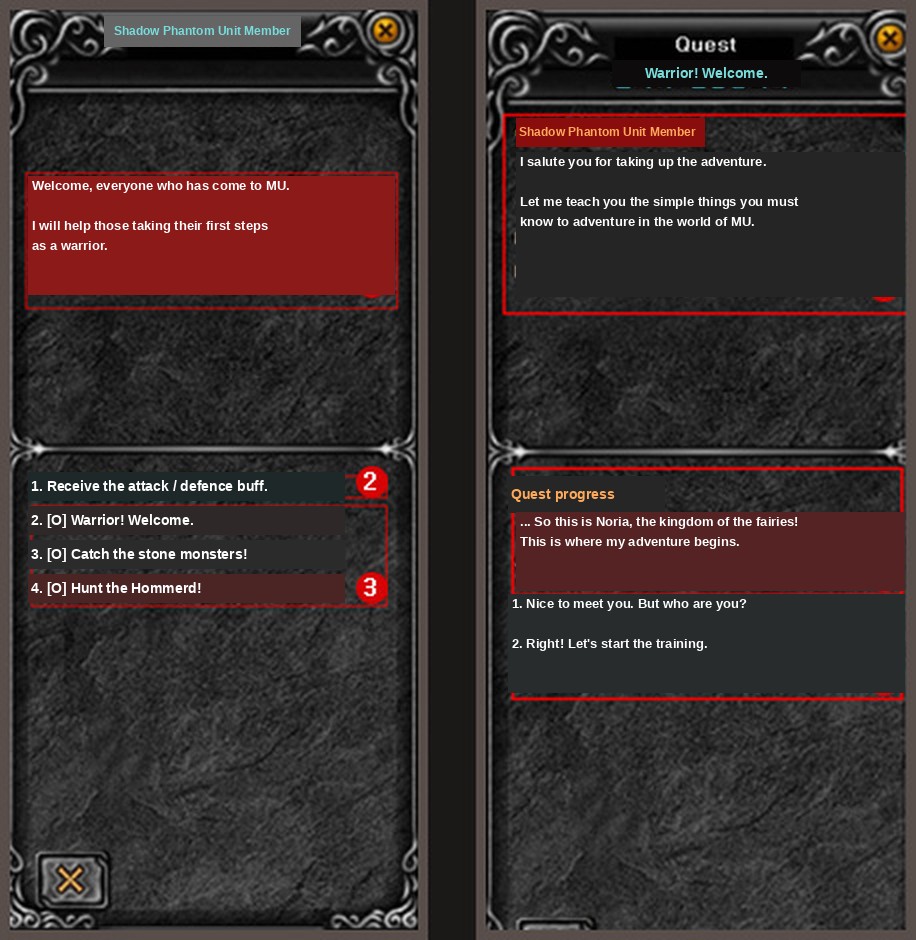
Shadow Phantom Unit members had stood in every village for years as a free buff and nothing else. Season 5 gave them a second job: the panel still offers the attack and defence enhancement, and under it sits the quests your character can take.
| Marker | What it shows |
|---|---|
| 1 | What the guard says to you |
| 2 | The attack and defence enhancement buffs these NPCs have always handed out |
| 3 | Quests your character is eligible for at this moment |
| 4 | The mission brief for whichever of those you highlight |
| 5 | Your character's name and the running conversation |
| 6 | The two options that accept or refuse the offer |
The list is filtered by your character, so it changes as you level. Take the buff, close the window, and you walk past quests put there for you.
The tutorial, and why you will skip it
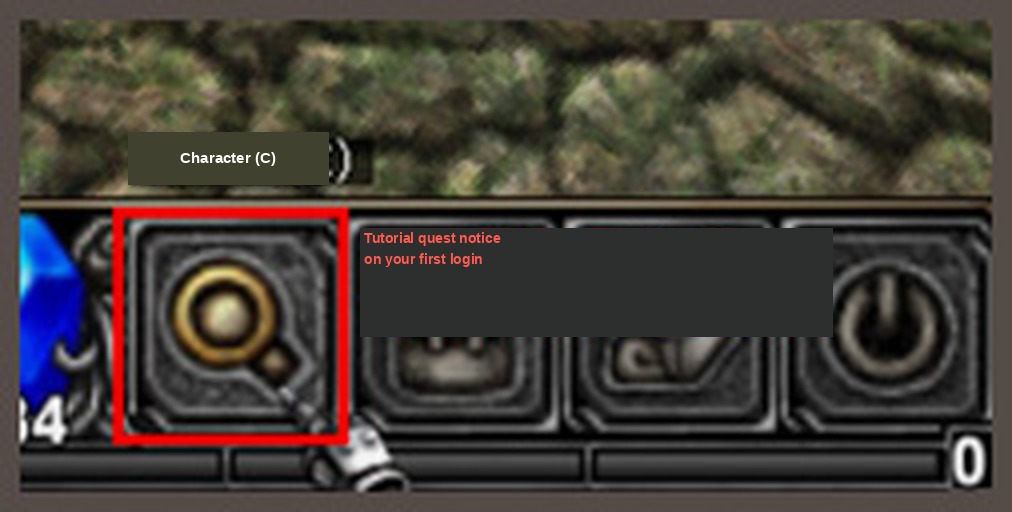
A new character is handed a tutorial quest on its first login: the Character (C) button at the bottom right flashes, and clicking it starts the walkthrough. Step one is opening your own character window, and it pays 100 experience — on high exp, less than you earn walking to the first spawn. Clear it if the blinking annoys you, but know it exists, because that flashing button makes people think something has broken.
Season 5's maps as one levelling ladder
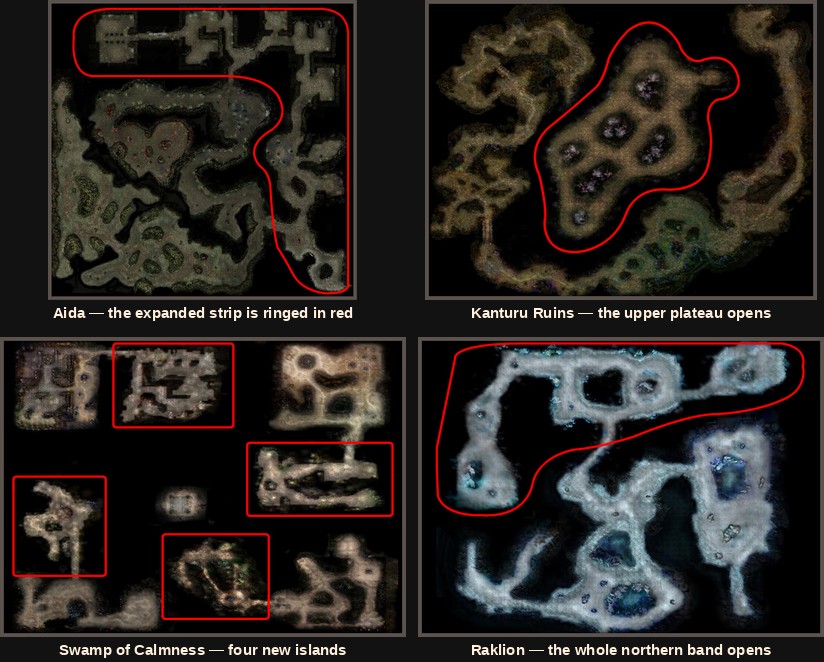
Season 5 did not open four unrelated areas. It extended four maps you already had and staffed the new ground with monsters running in an unbroken line from level 114 to 148, so the expansions read as a ladder you climb rather than four destinations you pick between. Aida takes 114 to 120, Kanturu Ruins 123 to 129, the Swamp of Calmness 131 to 137, and northern Raklion 140 to 148.
Where that lands depends on your rates. On a high-exp Season 22 server the whole band is an evening at most and you cross it without stopping, so none of these areas is somewhere you settle. They cover the stretch where you outgrow the content handed to you earlier, on maps you can already reach.
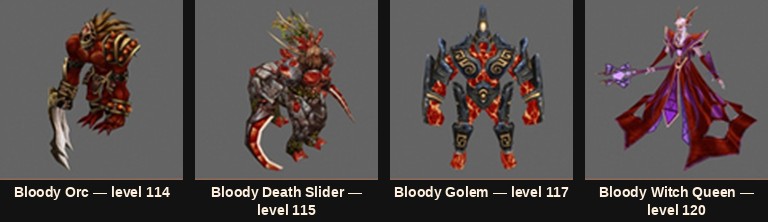
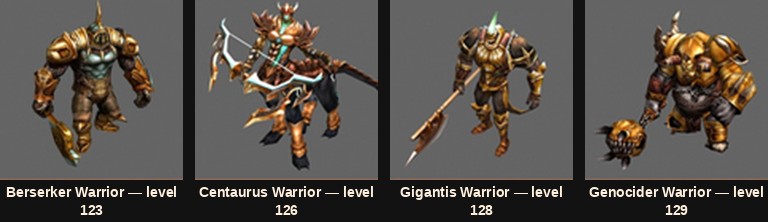
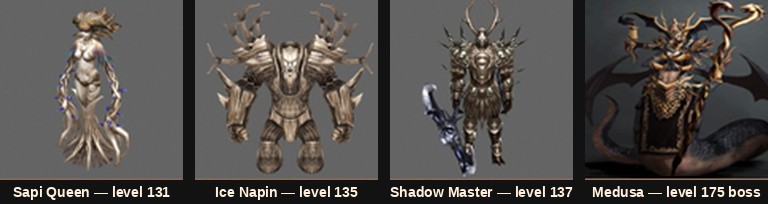
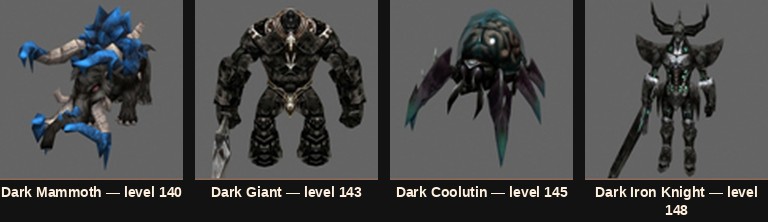
Every monster Season 5 added
All sixteen in ladder order rather than split across four tables, so your own level is one column away.
| Monster | Map | Lv | Damage | HP | Def |
|---|---|---|---|---|---|
| Bloody Orc | Aida | 114 | 675 – 710 | 117,000 | 420 |
| Bloody Death Slider | Aida | 115 | 795 – 830 | 88,000 | 460 |
| Bloody Golem | Aida | 117 | 715 – 750 | 129,700 | 470 |
| Bloody Witch Queen | Aida | 120 | 835 – 870 | 85,700 | 480 |
| Berserker Warrior | Kanturu Ruins | 123 | 915 – 990 | 184,370 | 543 |
| Centaurus Warrior | Kanturu Ruins | 126 | 970 – 1,005 | 198,500 | 570 |
| Gigantis Warrior | Kanturu Ruins | 128 | 1,046 – 1,181 | 203,000 | 630 |
| Genocider Warrior | Kanturu Ruins | 129 | 1,240 – 1,375 | 218,500 | 715 |
| Sapi Queen | Swamp of Calmness | 131 | 1,441 – 2,017 | 218,000 | 670 |
| Ice Napin | Swamp of Calmness | 135 | 1,585 – 2,060 | 230,000 | 730 |
| Shadow Master | Swamp of Calmness | 137 | 1,743 – 2,092 | 242,000 | 700 |
| Dark Mammoth | Raklion | 140 | 1,741 – 2,317 | 237,000 | 785 |
| Dark Giant | Raklion | 143 | 1,885 – 2,360 | 254,000 | 820 |
| Dark Coolutin | Raklion | 145 | 2,043 – 2,392 | 248,000 | 850 |
| Dark Iron Knight | Raklion | 148 | 2,217 – 2,601 | 265,000 | 860 |
| Medusa (boss) | Swamp of Calmness | 175 | 7,000 – 8,000 | 7,800,000 | 1,450 |
Two things are missing from that table and both are informative: none of these monsters has any MP, and there is no elemental or defence-success column, because neither existed yet. The attribute layer that decides how you gear a character today sits on top of all of it. Read the figures as a record of 2009, not a prediction — this band has been rebalanced since, and servers adjust it further.
Medusa, the one fight still worth planning for
Everything else here is background. Medusa is the exception: a field boss on the Swamp of Calmness, walking the map with her minions behind her, still hunted rather than read about.
| Stat | Medusa |
|---|---|
| Level | 175 |
| HP | 7,800,000 |
| Damage | 7,000 – 8,000 |
| Defence | 1,450 |
| Spawn | Random, with no published schedule |
Set that against the ladder: the hardest ordinary monster above has 265,000 HP, while Medusa has nearly thirty times as much and hits three times as hard. She sits on an open field rather than in an instance, so you can stumble into her, and the random spawn still shapes the fight. No timer to camp also means nobody owns her by reading a timetable faster than you. On our Season 22 server events and mini-bosses run all day, so she is one more thing in the rotation. Go when you see her, and not solo on a fresh character.
Twelve sets, and the one rule that outlived them
All twelve are built from armour you wear in your first hour: Leather, Bronze, Scale, Brass and Plate for melee, Pad, Bone and Sphinx for casters, Vine, Silk, Wind and Spirit for the Elf. The rule is what lasted. Partial bonuses switching on at two, three, four or five matching pieces, plus a separate bonus for completing the set, is still how set gear reads, so these twelve are a cheap way to learn the grammar. Below, 2pc is the bonus at two pieces; DK is Dark Knight, DW is Dark Wizard, MG is Magic Gladiator.
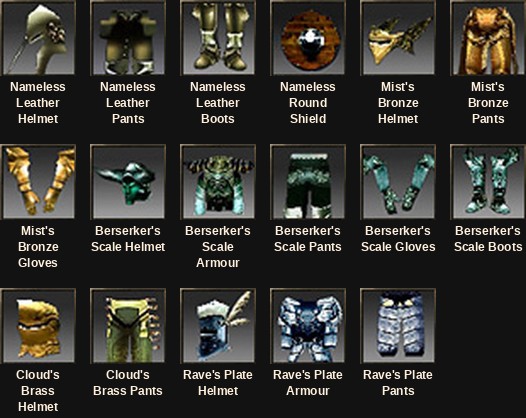
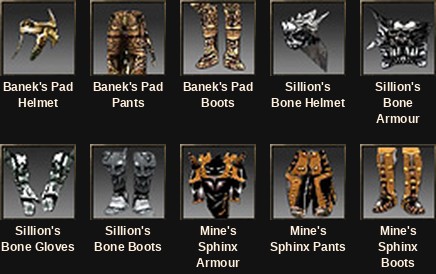
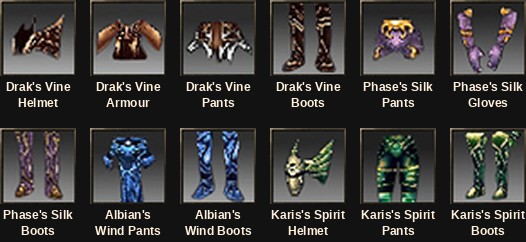
Four repay a closer look. Berserker is the only five-piece set here and the only one whose bonus grows with every piece added, which is the case for completing sets in miniature. Cloud and Albian are the opposite lesson: two pieces each, for critical damage and ignore enemy defence, at almost no cost in slots. Sillion breaks the pattern with +50 to strength, agility, vitality and energy on completion — enormous in 2009, a rounding error against our 32,700 stat cap.
| Set | Class | Armour pieces | Bonus as pieces stack | Completion bonus |
|---|---|---|---|---|
| Nameless | DK / MG | Leather Helmet, Leather Pants, Leather Boots, Round Shield | 2pc +50 Max Life · 3pc +50 Agility · 4pc +25% Shield defence | +30 Damage increase |
| Mist | DK / MG | Bronze Helmet, Bronze Pants, Bronze Gloves | 2pc +20 Vitality · 3pc +30 Skill attack power | +10% Double damage rate, +20 Agility |
| Berserker | DK / MG | Scale Helmet, Scale Armour, Scale Pants, Scale Gloves, Scale Boots | 2pc +10 Max attack power · 3pc +20 · 4pc +30 · 5pc +40 | +40 Skill attack power, +40 Strength |
| Cloud | DK / MG | Brass Helmet, Brass Pants | 2pc +20% Critical rate | +50 Critical damage |
| Rave | DK / MG | Plate Helmet, Plate Armour, Plate Pants | 2pc +20 Skill attack power · 3pc +10% Double damage rate | +30% Two-handed sword damage, +5% Ignore enemy defence |
| Banek | DW / MG | Pad Helmet, Pad Pants, Pad Boots | 2pc +10% Magic power · 3pc +20 Energy | +30 Skill attack power, +100 Max mana |
| Sillion | DW / MG | Bone Helmet, Bone Armour, Bone Gloves, Bone Boots | 2pc +5% Double damage rate · 3pc +5% Critical rate · 4pc +20 Defence | +50 Strength, +50 Agility, +50 Vitality, +50 Energy |
| Mine | DW / MG | Sphinx Armour, Sphinx Pants, Sphinx Boots | 2pc +30 Energy · 3pc +30 Defence | +100 Max mana, +15 Skill attack power |
| Drak | Elf | Vine Helmet, Vine Armour, Vine Pants, Vine Boots | 2pc +20 Agility · 3pc +25 Damage increase · 4pc +20% Double damage rate | +40 Defence, +10% Critical rate |
| Phase | Elf | Silk Pants, Silk Gloves, Silk Boots | 2pc +100 Max Life · 3pc +100 Max mana | +100 Defence |
| Albian | Elf | Wind Pants, Wind Boots | 2pc +30 Agility | +5% Ignore enemy defence |
| Karis | Elf | Spirit Helmet, Spirit Pants, Spirit Boots | 2pc +15 Skill attack power · 3pc +10% Double damage rate | +10% Critical rate, +40 Agility |
The repeatable quest idea, before it had a name
Late in the season two more quest types joined the story and class-change lines. They matter more as an idea than as content you will go and do.
| Type | What the server does |
|---|---|
| Random Repeatable Quest | Picks a quest for you out of your level bracket and rolls the reward as well, so running the same bracket again keeps producing different outcomes rather than the same payout twice. |
| Event Map Quest | Bolts an extra objective onto an event map. Clear it while you are running the event and you are paid for it separately from whatever the map itself gives you. |
Between them that is the template for everything repeatable on a modern server: a quest that regenerates instead of ending, and a quest layered on activity you were already doing. Season 5 built the mechanism and barely used it. The names, brackets and reward tables were published separately, and servers configure this area heavily, so read your own server's quest list.
What later seasons replaced
- The stat tables are historical. All four maps still exist; the 114 to 148 figures describe their 2009 version.
- Flat monsters are gone. No MP, no element, no defence success rate — the attribute layer arrived later.
- The twelve sets are starter gear. The stacking-bonus mechanic lives on; the items are not worth a detour.
- Sillion's +50 to every stat is a rounding error against a 32,700 cap.
- The tutorial's 100 experience does not register on high exp.
- Random repeatable quests were absorbed into the daily and event content servers schedule now.
Not replaced: the T window, the Shadow Phantom guards doing double duty, and Medusa.
What to actually do with Season 5
- Press T once, read all three tabs, and find Open Quest before you need it.
- Click the Shadow Phantom guard in every village you pass, and read the list, not just the buff.
- Do not farm the 114 to 148 band deliberately; on high exp you cross it incidentally.
- Do not chase the twelve sets. Learn how the bonuses stack, then spend on current gear — our custom jewel system is worth understanding first.
- Do take Medusa seriously. A random spawn makes her opportunistic, not optional.
Our server runs Season 22 on the latest server files, opens on 30 October 2026, and has high exp, stats capped at 32,700, and events and mini-bosses all day. Make an account and press T.
- Still live: the T quest window and its three tabs, and the Shadow Phantom guards handing out quests as well as buffs.
- Safe to skip: the first-login tutorial pays 100 experience, which high exp erases before you reach the first spawn.
- The expansions are one ladder, level 114 in Aida to level 148 in northern Raklion, across four maps you already had.
- Medusa is the exception worth a trip: level 175, 7,800,000 HP, random spawn, so no timer to camp.
- Twelve sets were added, and the stacking-bonus rule they introduced outlived every piece they were built from.
- No MP, no elements, no defence success rate: read these tables as a 2009 record, not as your server's numbers.