Your character on a Season 22 server runs into Season 12 twice and cannot dodge either collision. At level 750 an NPC in Lorencia stands between you and a class change you have to have. At 770 a dungeon opens that is where the next 150 levels come from. Both gates are still structural nine seasons later; much of the rest of the 2016 - 2017 release has been built over. This guide sorts it into what you walk into, what you walk past, and what only survives in patch notes.
The short version of what shipped
Season 12 came in two halves with different jobs. The 2016 half was content: a frozen map with a 30 million HP spirit on it, a solo dungeon that resets weekly, and two more rungs bolted onto the mastery gear ladder. The 2017 half was structural, and it is the half that still shapes how a character is built. It lifted the ceiling from 800 to 920, put a fourth class change in front of every class, gave each a second skill tree with status effects attached, and built a five-floor grinding map to feed the new levels. Where Season 11 widened machinery that existed, this added a layer, which is why little of it could be quietly replaced later.
Where Season 12 sits on your route
Everything here is gated by a level, and the gates sit close enough to read as one stretch of the game. As one ladder, with what each is worth when experience is fast:
| Level | What unlocks | Worth stopping for? |
|---|---|---|
| 600 | Dark Angel weapons become equippable | Only with a Blood Angel weapon to upgrade |
| 700 | Nixies Lake, via Raklion or the move window | Yes, for excellent Holy Angel drops |
| 750 | Sent's quest chain, through the Space of Qualification | Yes, the moment you qualify |
| 770 | Deep Dungeon floor 1 | Yes, your grinding map to the cap |
| 800 | Chain completion, 4th class, enhancement tree, Holy Angel armour | Mandatory; a third-class character stops earning here |
| 920 | The Season 12 ceiling | Historical; Season 22 sits far above it |
Two experience rules arrived with the new cap and both still catch people out. A third-class character earns nothing past level 800 and resumes only after the class change, so a stalled character is usually one that skipped Sent. Once you are fourth class, only monsters of monster level 160 or higher pay you anything, which is the real reason Deep Dungeon exists. The new experience table applies at the instant of the change, so a character above 800 can see its level shift; 810 commonly lands at 813 to 815.
The other rule is a damage band. If your level exceeds the monster's level plus 600, everything lands at full strength. Below that you lose roughly 10% of your attack damage per level of shortfall and take correspondingly more, stopping at 70%, with normal, elemental and debuff damage treated alike. It is why nobody can be dragged through high-level content by a friend.
Attack speed also became a hard per-class ceiling. Once you hit the number, buffs and items stop contributing, and the character window reports it as current / maximum.
The 4th class change, and the one thing people get wrong
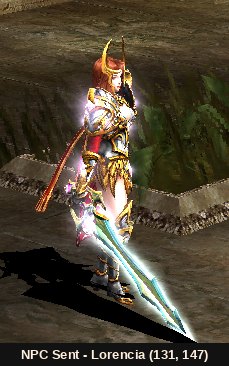
Sent is a Guardian Knight of Lugard and one of the twelve Priests of Light, sent to Lorencia at Priest Devin's request to test whoever shows up. Mechanically she is a three-stage instance. Talking to her drops you into the Space of Qualification, where parties form; one member applies and the whole party is pulled into the Space of Trial. You need 750 to walk in and 800 to walk out finished. People get this wrong by treating it as optional content to come back to. Progress is saved, so start early and resume at whatever stage you reached.
| Stage | What the trial asks | Stat points | Also pays |
|---|---|---|---|
| 1. Test of Qualification | Sent fights you herself. Take her HP to 0, then talk to her | 20 | — |
| 2. New Battle (1) | Five each of the Deep Dungeon Skeleton Warrior, Cyclops and Ghost, then five minutes of endless spawns without dying | 30 | — |
| 3. New Battle (2) | Sent again, with more skills in her rotation and far shorter gaps between casts | 50 | Ashen Scroll of Oblivion, the 4th class change, the skill enhancement tree |
That is 100 stat points in total, a rounding error against a 32,700 cap. The class change and the tree are the payment. Two party rules matter: the chain belongs to the character who accepted it, and only party members on the same stage finish alongside you. The Ashen Scroll of Oblivion arrives through the Gremory Case and is held 7 days.
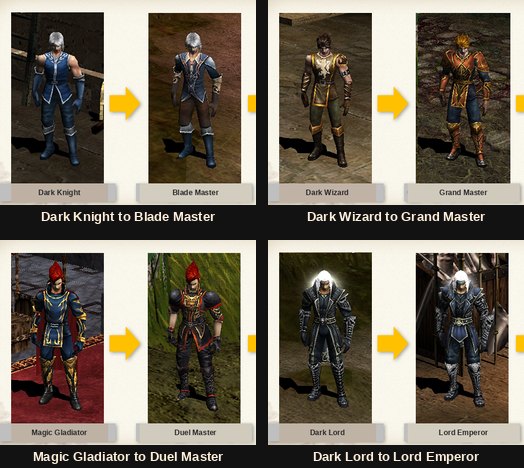
The naming ladder, with each class's attack speed ceiling folded in:
| Base class | 3rd class | 4th class | Attack speed ceiling |
|---|---|---|---|
| Dark Lord | Lord Emperor | Empire Lord | 450 |
| Rage Fighter | Fist Master | Fist Blazer | 441 |
| Magic Gladiator | Duel Master | Magic Knight | 351 |
| Dark Knight | Blade Master | Dragon Knight | 288 |
| Dark Wizard | Grand Master | Soul Wizard | 284 |
| Elf | High Elf | Noble Elf | 275 |
| Grow Lancer | Mirage Lancer | Shining Lancer | 273 |
| Summoner | Dimension Master | Dimension Summoner | 188 |
The enhancement tree is the actual reward
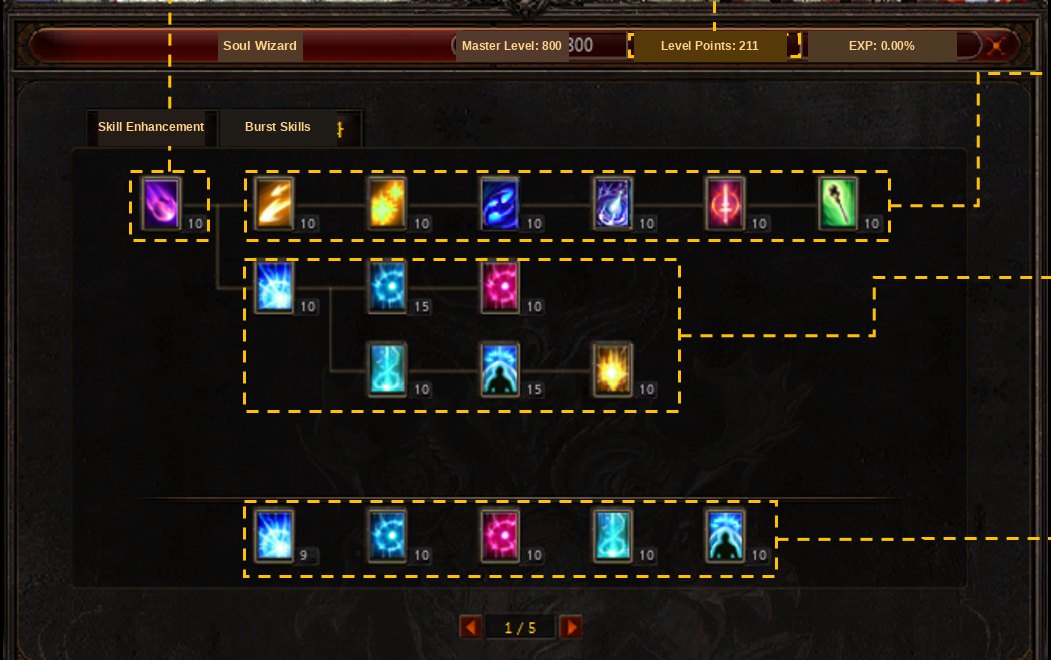
Clearing Sent unlocks a second tree, opened with Ctrl + A or from the character window, and this is where the class change pays out. You earn one point per level after the change. Each class has a fixed shortlist of eligible main skills, and the enhanced version replaces the original rather than sitting beside it.
The options are familiar quantities: damage, hit count, attack speed, range, splash damage, extra targets, cooldown reduction, and weapon attack or wizardry power. The constraint is what matters. An option is welded to one main skill and does nothing for any other, so spreading points buys less than committing to the one or two skills you press. That logic is unchanged today.
Debuffs and the skills that detonate them
The tree also sells debuff options, applied at whatever chance you bought. Each line has two steps: the basic option lands the basic debuff, the upgrade option promotes it while the basic one is still ticking. All four can sit on one target at once, and on release they worked on monsters only. Each line has a matching explosion skill, which is the point of the mechanic, so the table is built around that rather than the status effect.
| Explosion skill | Line | Apply first | Then promote to | What detonating it does |
|---|---|---|---|---|
| Stun Boom | Shock | Shock | Stun | Blows up the stun, blinding the target for 2 seconds |
| Bleeding Hit | Bleed | Bleeding | Heavy bleeding | Blows up the bleed and strips defense from the target for a while |
| Frozen Slayer | Freeze | Frost | Frozen | Blows up the freeze as splash damage around the target |
| Poison Storm | Poison | Venom | Intoxication | Blows up the intoxication and seeds venom onto nearby monsters |
An explosion skill will not fire without the upgraded debuff in place, and firing it consumes the debuff, which you reapply. That is a two-beat rotation per line, not a button you hold. The MU Helper learned the same pattern: explosion skills are barred from the basic skill slot but accepted in both trigger slots, with the trigger conditions collected into one settings popup.
Deep Dungeon, where 770 to 920 happens
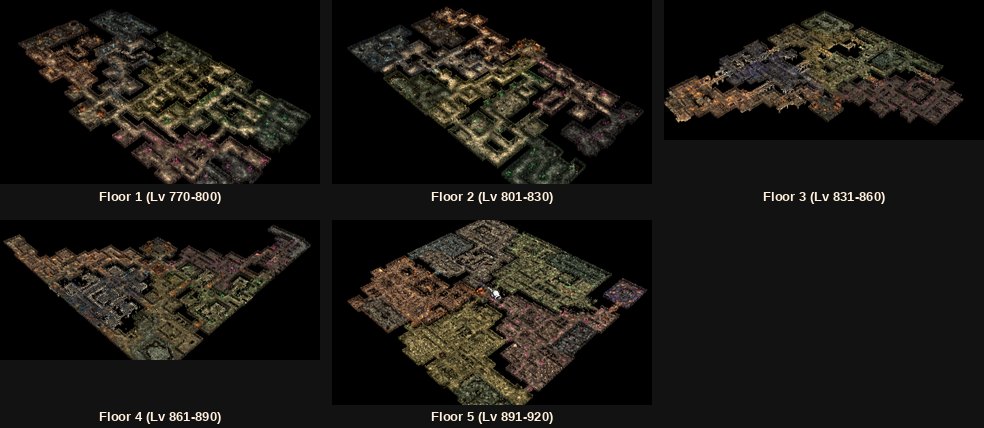
Deep Dungeon exists for one reason: fourth class characters only earn from monster level 160 and above, and the game did not have enough of those. Entry needs level 770, through the Lorencia entrance at (177, 31) or the move command window.
The floors are a staircase, not alternatives, and the bands are tight enough that you are rarely on one for long. Drops are the same across all five: jewels, normal and excellent equipment, excellent Holy Angel armour and elemental items, with jewellery phased in as you descend.
| Floor | Monster level | Your level | Who lives there | Jewellery drops |
|---|---|---|---|---|
| 1 | 170 | 770 – 800 | Skeleton Warrior, Larva, Cyclops | — |
| 2 | 200 | 801 – 830 | Cyclops, Ghost, Skeleton Archer | — |
| 3 | 230 | 831 – 860 | Skeleton Archer, Hell Hound, Hell Spider | Rings |
| 4 | 260 | 861 – 890 | Hell Spider, Skeleton Warrior Captain, Thunder Lich | Rings and necklaces |
| 5 | 290, Gorgon 300 | 891 – 920 | Thunder Lich, Poison Bull Fighter, Dark Knight, Gorgon | Rings and necklaces |
Floor 1 has a second use: stage 2 of Sent's trial asks for Deep Dungeon Skeleton Warriors, Cyclops and Ghosts. On fast experience you cross all five floors, and the only real decision is whether to park on 4 or 5.
Nixies Lake: an armour map, not a levelling map
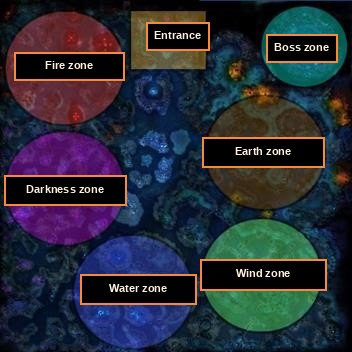
The lore is short: Nixies Lake was the finest lake on the continent until Selupan's blizzard wrecked it and killed the spirit Nixie, after which her brother Nix took the frozen remains. Practically, this is where excellent Holy Angel armour drops, which is the only reason to come outside a boss run.
Entry opens at level 700, ahead of both Sent and Deep Dungeon. Use the Raklion gate at (210, 218) or pay 50,000 zen in the move command window. Three residents, softest to hardest, with the boss for scale.
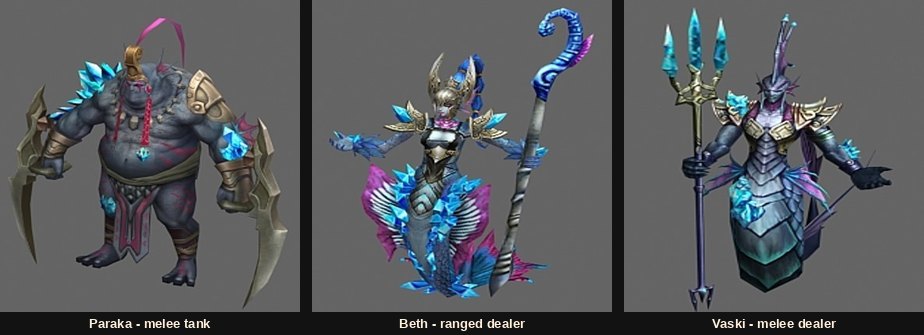
| Monster | HP | Defense | Elemental defense | Attack | Elemental attack | Attack speed |
|---|---|---|---|---|---|---|
| Beth | 120,000 | 1,400 | 1,500 | 1,500–1,600 | 960–990 | 800 |
| Vaski | 125,000 | 1,500 | 1,500 | 3,100–3,200 | 1,200–1,300 | 2,000 |
| Paraka | 240,000 | 1,800 | 1,500 | 2,500–2,550 | 930–1,110 | 1,000 |
| Nix (boss) | 30,000,000 | — | — | — | — | — |
All three share 1,500 elemental defense while physical defense varies, and Vaski attacks at twice Beth's speed for double the damage, which makes him the one that kills unprepared characters. Read the stats as a 2016 record.
Nix: the fight Season 12 is remembered for
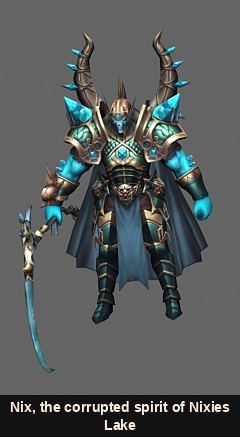
Getting in is a shopping trip first. You need a Fragment of Spirit Nixie from Priest James's Ruud shop in Elbeland (32, 239) or the Event Map Plaza (216, 55), and every party member needs their own. Click the frozen Spirit Nixie on the lake at (113, 109) and the fragment is spent on the way through.
Three rules decide the run before any skill is cast. The door seals once the first person is inside, so latecomers are out. Anyone who dies is out with no way back in. And the drop is one item per character present at the moment of death, so bodies on the floor cost the whole group. After the kill you get 5 minutes before being moved to the safe zone at (24, 118).
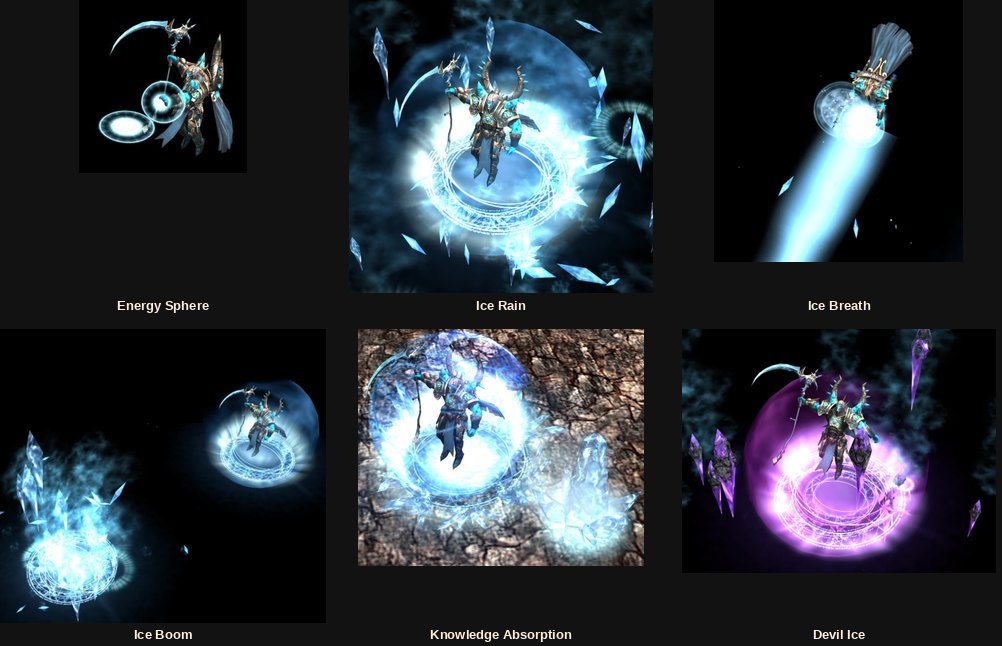
The list is ordered by how much it should worry you, not by the boss's rotation.
| Skill | What happens | Why it matters |
|---|---|---|
| Devil Ice | Magic circles appear at random spots, then 10 seconds later black ice falls on everything that is not a circle | Being caught sets your HP to 0. Stand in a circle |
| Knowledge Absorption | At HP thresholds Nix goes invulnerable for 3 minutes, raises 2 barrier stones and spams Ice Rain | Stones take elemental damage only; miss the window and 20 lake monsters spawn |
| Ice Breath | A long line of ice straight ahead | Slows you for a minute and sets up the next skill |
| Ice Boom | Follows Ice Breath. A circle forms under the target and fills with ice shards after 2 seconds | Two seconds is enough to leave |
| Ice Rain | Ice falls around the boss | Low chance of a 30 second freeze, which is what makes the barrier phase ugly |
| Energy Sphere | A thrown sphere of energy | High chance of a 30 second attack and defense debuff |
| HP recovery | Heals every second once nothing has been in range for 4 seconds | Keep someone in range at all times |
The fight rewards a group that can deal elemental damage and read a floor. On our Season 22 server events and mini-bosses run all day, so Nix is one entry in a rotation, but the barrier phase still decides whether you finish.
Labyrinth of Dimensions, the weekly solo run
Elena's warped dimension became a single-player dungeon here and is still recognisably the same thing. You enter alone through the Gate of Dimension at the Event Map Plaza (236, 58), at master level or above, with at least 10 stamina. It resets at maintenance, Thursday 08:00 to 10:00, and anyone inside at 08:00 is removed.
The run is 7 stages, each a scatter of disconnected rooms joined by gates and arranged differently every time. Normal rooms are empty. Special rooms hold 4 to 8 endlessly respawning monsters and set one mission, with the exit gate appearing only once it is done. The exit room sets five missions at once and clearing them clears the stage. The missions are varied on purpose, and a few are far slower than the rest.
| Mission the room can set | What it turns on |
|---|---|
| Kill a target number of monsters | Clear speed |
| Kill a target number without healing potions | Clear speed and survivability |
| Kill a target number without mana potions | Clear speed and mana efficiency |
| Reach a target cumulative damage dealt | Single-target output |
| Reach a target cumulative damage taken | Patience |
| Reach a target amount of experience | Your server's rates |
| Collect a target amount of zen | Pickup time |
| Reach a target Helper usage time | Nothing. Set it running |
Payment is Ruud and heavily back-loaded. The running total is why you push to the end rather than banking three stages.
| Stage | Ruud | Running total | Extra |
|---|---|---|---|
| 1 | 150 | 150 | — |
| 2 | 200 | 350 | Jewels of Bless |
| 3 | 450 | 800 | Jewels of Bless |
| 4 | 800 | 1,600 | Jewels of Bless |
| 5 | 1,550 | 3,150 | Jewels of Bless |
| 6 | 1,850 | 5,000 | Jewels of Bless |
| 7 | 2,000 | 7,000 | Jewels of Bless |
Stage 7 alone beats stages 1 to 3 combined. Rewards land in the Gremory Case for 7 days, and the Jewel of Bless count scales with your kill count, so clearing rooms thoroughly pays twice. Three constraints: monsters drop zen and nothing else, town portal scrolls do not work, and the minimap shows only rooms you have stood in. Entries reset at maintenance and you restart at stage 1.
Dark Angel and Holy Angel: the tier you are climbing toward
Season 12 added two rungs to the mastery ladder, one for weapons and one for armour, both crafted rather than farmed. Both run at 100% at the Chaos Goblin in Noria (180, 103), which makes this the least risky upgrade step in the game.
| You end up with | Feed it | Plus the material | Plus jewels | Carried over |
|---|---|---|---|---|
| Dark Angel weapon, at +0 | Blood Angel weapon, +11 with +16 additional damage | Anvil of Dark Angel, from Priest James for Ruud | 30× Bless +2, 30× Soul +2, Jewel of Chaos, Jewel of Creation | Excellent options and Luck |
| Holy Angel armour, at +0 | Dark Angel armour, +11 with +16 additional defense | Soul of Holy Angel, from Priest James for Ruud | 30× Bless +2, 30× Soul +2, Jewel of Chaos, Jewel of Creation | Set stat option and Luck |
Read the first column carefully: the item drops back to +0. The options that make it valuable survive, the levels do not, so finish the tier climb before pouring jewels into refinement.
Dark Angel weapons need level 600 and carry excellent damage rate +10%, attack or wizardry +45, attack speed +7, +1.6 attack per 20 levels, and life and mana recovery on kills. Requirements are split out below, since they usually decide whether you can hold one yet.
| Weapon | Wielded by | Req. STR | Req. AGI | Attack power | Speed |
|---|---|---|---|---|---|
| Dark Angel Bow | High Elf | 192 | 1,118 | 375–395 | 45 |
| Dark Angel Claw | Fist Master | 547 | 186 | 252–262 | 35 |
| Dark Angel Lance | Mirage Lancer | 418 | 297 | 178–188 | 40 |
| Dark Angel Magic Sword | Duel Master | 419 | 149 | 351–361 at 70% | 45 |
| Dark Angel Scepter | Lord Emperor | 408 | 147 | 262–272, pet 68% | 40 |
| Dark Angel Staff | Grand Master, Duel Master | 208 | 97 | 143–149 at 102% | 30 |
| Dark Angel Stick | Dimension Master | 341 | 103 | 133–139 at 100% | 30 |
| Dark Angel Sword | Blade Master | 935 | 303 | 354–365 | 40 |
Holy Angel armour needs level 800, so it needs the class change, and its set bonuses were the strongest in the game at the time. Excellent pieces drop in Nixies Lake and the Deep Dungeon, so the two maps above are where you build it. Bonuses run from the full set down.
| Pieces matched | What the set adds |
|---|---|
| 4 pieces | All stats +20, base defense +40 (wizard sets +60, fighter and lancer sets +35), critical damage +40, excellent damage +70, critical damage rate +20%, excellent damage rate +20%, ignore enemy defense 9% |
| 3 pieces | Double damage rate +18% and attack power +100, or wizardry +100 on wizard sets |
| 2 pieces | Skill attack power +35, or +50 on wizard sets, plus +90 to the set's main stat |
Two materials were renamed here, which matters because older guides use the old words: the Soul of Ancient Hero became the Soul of Blood Angel, the Fragment of Sealed Stone the Soul of Dark Angel. The ladder continues in Season 13.
Quivers, the socket cap and the dual-class sets
The quiver changed how bows work permanently. Bows and crossbows became one-handed: the bow sits in the left slot, a quiver in the right. The quiver is equipment, not ammunition. It takes Luck and additional damage, enhances from +0 to +15, comes in normal, excellent, socket and mastery versions, and lets a bow fire without consuming arrows. Its attack and speed count only while a bow is equipped.
| Quiver | Req. STR | Req. AGI | Attack power | Speed | How you get it |
|---|---|---|---|---|---|
| Dark Angel Quiver | 186 | 1,107 | 341–366 | 55 | Second mastery weapon crafting |
| Blood Angel Quiver | 177 | 1,049 | 283–310 | 55 | Priest James |
| Devilwood Quiver | 149 | 851 | 181–207 | 55 | Drops from Selupan |
| Battle Quiver | 62 | 172 | 111–137 | 50 | Elder Garus in Noria; the excellent version drops from level 77 to 95 monsters |
The complication is sockets. With socket items in both hands the total across both is capped at 6, so a 5-socket weapon leaves room for a 1-socket quiver and nothing more. The fix shipped alongside it: the Seed Master in Elbeland (46, 243) takes an empty 4- or 5-socket item plus a Jewel of Creation, a Jewel of Chaos and 1,000,000 zen and returns a 3-socket item at 100%, keeping level, skill, Luck and options. Socket bows now drop with 1 to 3 sockets.
Mastery sets for the off-build classes
Energy elves and wizard-type magic gladiators had no mastery sets of their own. Season 12 gave them both, sold sealed by Priest James at 30,000 Ruud a piece, and added conversion scrolls so an existing set changes allegiance at the Chaos Goblin at 100%, keeping level and options.
| Scroll | Converts | Ruud |
|---|---|---|
| Attack-type Elf scroll | Support elf set into an attack elf set | 30,000 |
| Knight-type MG scroll | Wizard MG set into a knight MG set | 30,000 |
| Support-type Elf scroll | Attack elf set into a support elf set | 10,000 |
| Wizard-type MG scroll | Knight MG set into a wizard MG set | 10,000 |
Moving toward the less common build costs a third of moving back, so buy the direction you intend to keep.
The interface work that quietly stayed
This is the pile nobody writes about and everybody uses. Roughly 200 guide quests were added on their own tab in the quest window. They accept themselves as you reach each level, one at a time, and you claim the reward in the window with no NPC involved. They ask for travel, item collection, kills, a level, or another quest, and an Instant Move button teleports you to the map and walks you to the objective. Abandoning one immediately accepts the next and the abandoned quest is gone for good; a chapter can be switched off with the checkbox beside its title.
The move command window also gained a favourites list of up to five destinations, the most-used thing in this release and ten seconds to set up. A Dark Spirit can be carried in the inventory and activated by right-clicking, like the Dark Horse. Reconnecting in Feria, Nars or Nixies Lake drops you in the safe zone. Unread mail shows an icon that opens the mailbox, the login, character and friend windows were redrawn, and movement levels for first and second class characters were unified: Dungeon 3 50 to 40, Atlans 70 to 60, Lost Tower 4 and 5 60 to 50.
What later seasons made irrelevant
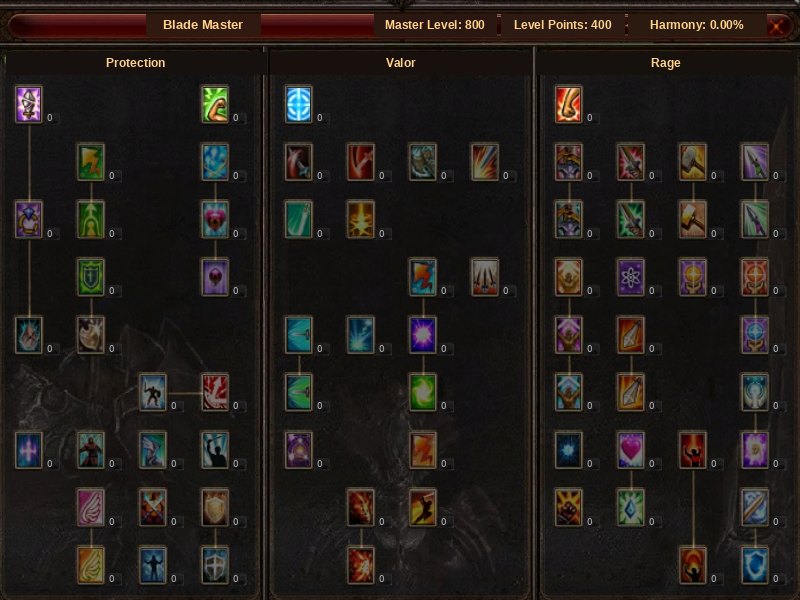
The master skill tree renewal is the clearest example. With status effects moving to the new tree, the debuff-flavoured master skills were pulled from the old one: every class lost Increase Poison, Lightning and Ice Resistance and Strong Will. A set of chance-based nodes went from 1 point to 10 points per rank while their cap rose from 3.34% to 4.17%: Vengeance, double damage, ignore defense, excellent damage, critical damage, and full mana, life and SD recovery. Stun and slow masteries gave way to plain damage or utility. The Blade Master lost Twisting Slash Mastery, Rageful Blow Mastery, Death Stab Proficiency and Mastery, Blow Mastery and both Iron Defense nodes; Blow Proficiency became a damage increase, Combo Strengthener dropped from rank 8 to 7, and Max Life Amplification appeared at rank 7. All of it has been reworked since.
The event map rebanding is the same story. Season 12 recut Chaos Castle, Blood Castle, Devil Square and Doppelganger into seven level tiers, each with its own Mastery Box payout.
| Tier | Level band | Mastery Boxes |
|---|---|---|
| 7 | 770 and above | 2 |
| 6 | 650 – 769 | 2 |
| 5 | 550 – 649 | 2 |
| 4 | 400 – 549 | 1 |
| 3 | 300 – 399 | — |
| 2 | 200 – 299 | — |
| 1 | 50 – 199 | — |
Illusion Temple got five bands instead of seven, at 180 to 299, 300 to 399, 400 to 599, 600 to 769 and 770 plus, paying 2 boxes from the third band up; the Imperial Guardian fortress also pays 2. Ruud inside low, mid and high mastery boxes was cut and event monsters rebalanced to match. Every number there is a server setting now, and with a cap far above 920 the top tier is simply where you live.
Ruud was redenominated here: 1 Ruud became 100 Ruud, with every price and payout rescaled. That is why Ruud figures in guides written either side of Season 12 differ by two orders of magnitude, and it is the most common source of confusion in old material.
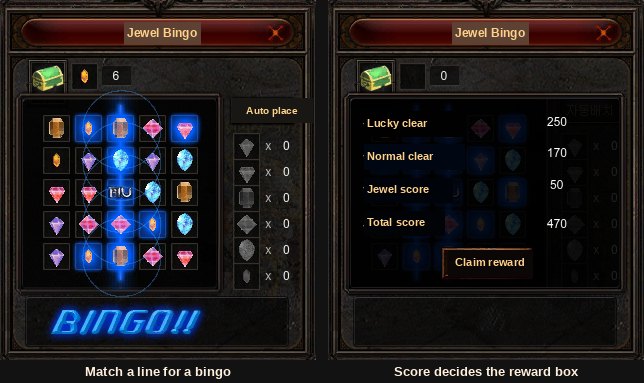
Jewel Bingo works like Mine Finder. Collect 24 card pieces while hunting, which means ticking "event item" in the Helper, and they form a card bundle. Place jewels on the board or use auto-place, pick a box, then click the jewel matching each one the box calls. Lines across, down and diagonally score, lines through the MU in the middle score more, and it ends when the box empties. The reward box depends on your score and lands in the Gremory Case (K) for 1 day. Most servers leave it as a curiosity.
- Gone: the 920 ceiling, Holy Angel as the top armour tier, and any value in Sent's 100 stat points against a 32,700 cap.
- Still doing real work: the class change, the enhancement tree and its explosion skills, the quiver, the guide quest tab, and the favourites list.
What to actually do about Season 12
- Go to Sent at 750, not 800, bring party members on your stage or go alone, and claim the Ashen Scroll inside 7 days.
- Spend tree points on the one or two skills you press, and learn one debuff line properly before the rest.
- Read the Deep Dungeon floors as a level band, and park on 4 or 5 for the necklaces.
- Go to Nixies Lake for excellent Holy Angel armour; watch Vaski, not Paraka.
- On Nix, stand in the circles during Devil Ice, bring elemental damage for the barrier stones, and keep someone in range so it cannot heal.
- Finish the Labyrinth to stage 7, and climb the gear tier before refining, since the upgrade resets the item to +0.
Our server runs Season 22 on the latest server files, opens on 30 October 2026, and has high exp, stats capped at 32,700, events and mini-bosses all day, and a custom jewel system. Make an account, or read the rest of the season guides first.
- Unavoidable: the 4th class change at Sent. Enter at 750, finish by 800, or your character stops earning.
- The real reward is the skill enhancement tree: Ctrl + A, one point per level, options welded to individual skills.
- Four debuff lines, four explosion skills. Apply, promote, detonate, reapply.
- Deep Dungeon is your grinding map from 770 up, because fourth class characters only earn from monster level 160 and above.
- Nixies Lake is an armour run; Nix behind it costs a Fragment of Spirit Nixie per person.
- Historical: the 920 cap, Jewel Bingo, the event rebanding, the master tree pruning.
- Still used daily: quivers, the guide quest tab, five move-window favourites.